


Back to Top
SETUP AND COST
Adding tapping to your parts incurs a minimum charge of $9 to your cart total.
Save up to 70% or more with quantity discounts! These are calculated based on several factors, including material, operation type,
number of operations per part, and number of duplicate parts. Our app will automatically apply quantity discounts to your order.
Visit our processing page for information on typical lead times for tapping and other services.
UNDERSTANDING THREAD TYPES AND SIZES FOR FASTENERS
THREAD ENGAGEMENT
Thread engagement is simply a way of describing what percentage of threads on a bolt are properly engaged with the threads on a nut. The same concept applies to tapped holes and their corresponding fasteners. The key here is to understand your materials.
To ensure your parts have the necessary strength for your applications, be sure to consider factors such as tension and shear.
THREAD PITCH
Thread pitch measures the number of threads within a given length. There are several ways to represent thread pitch:
- SAE (Society of Automotive Engineers)
- Metric
- ANSI (American National Standards Institute)

UNDERSTANDING DIAMETER
Diameter is a measurement that crosses directly through the center of your
geometry—in this case, the hole to be tapped and the corresponding fastener.
SAE is represented in this format: ½-20, which indicates a half-inch diameter with 20 threads per inch of the tapped length.
Metric is represented in this format: M10-1.25. This indicates a 10mm diameter with 1.25mm between each thread.
Instead of counting threads per inch, the metric system measures the distance between threads in millimeters.
ANSI has its own standardized sizes, represented like this: 10-24. Similar to the other two systems, these numbers indicate a
specific standardized fastener size. If you need an ANSI size, you likely already know it. If you're unsure,
there are charts available to verify dimensions in detail.
COARSE THREAD VS. FINE THREAD
It's also important to understand the difference between coarse and fine threads in relation to your project.
Fasteners or holes with coarse threads have larger pitches compared to fine threads, meaning they have
fewer threads per fastener or hole. In contrast, fine threads have smaller pitches and therefore more threads. Easy enough, right?
In most cases, you'll likely use coarse threads. However, there are scenarios where fine thread holes or fasteners would be preferable.
If you're deciding whether to use a fine thread tap, consider these pros and cons. Keep in mind that this is not an exhaustive list:
PROS OF FINE THREAD
- Superior strength compared to coarse threads of the same size
- Enable finer adjustments in certain applications
- Reduced likelihood of loosening
CONS OF FINE THREAD
- More susceptible to seizing and galling
- Less ideal for high-speed assembly due to seizing risk
- Require longer thread engagements
CONSIDERATIONS FOR TAP SIZE AND PLACEMENT
At Craft Cut Create, we ensure that holes are resized to perfectly match the tap you need. Even so, it's important to
consult our hole size chart when calculating the minimum distance from other cut features.
To guarantee optimal performance, the center of any tapped holes must be at least this distance from other cut features:
tap hole size/2 + the minimum tap hole-to-edge distance for your selected material.
This minimum distance is measured from the edge of the tapped hole to the nearest cut feature, and details can be found on
each material's information page, listed by stock thickness.
Below is a chart of our available tap sizes along with the required through-hole sizes for your design.
Apply the above formula to ensure adequate spacing between tapped holes and other cut features for the
best results in your applications.
THREAD/TAP HOLE SIZE CHART
| Tap |
Hole Size | MM |
| 4-40 |
0.091″ | 2.32 |
| 6-32 |
0.116″ | 3 |
| 8-32 |
0.138″ | 3.51 |
| 10-32 |
0.164″ | 4.17 |
| 1/4-20 |
0.209″ | 5.31 |
| 1/4-28 |
0.221″ | 5.62 |
| 5/16-18 |
0.266″ |
6.76 |
| 5/16-24 |
0.278″ | 7.07 |
| 3/8-16 |
0.323″ | 8.21 |
| 3/8-24 |
0.341″ | 8.67 |
| 1/2-13 |
0.435″ | 11.05 |
| 1/2-20 |
0.459″ | 11.66 |
| M2 x 0.4 |
0.065″ |
1.66 |
| M2.5 x 0.45 | 0.083″ | 2.11 |
| M3 x 0.5 |
0.102″ |
2.6 |
| M4 x 0.7 |
0.134″ |
3.41 |
| M5 x 0.8 |
0.170″ |
4.32 |
| M6 x 1.0 |
0.203″ |
5.16 |
| M8 x 1.25 |
0.274″ |
6.96 |
| M10 x 1.5 | 0.344″ | 8.74 |
SELECTING THE APPROPRIATE TAP FOR YOUR MATERIAL THICKNESS
Ideally, aim for maximum thread engagement and depth. Depending on the application, you may manage with less. For optimal strength,
target a depth ratio of 1-1.5 times the bolt diameter.
For example, an 8-32 bolt should have a thread depth of approximately 0.136” to 0.204”
QUICK FILE SETUP AND DESIGN GUIDELINES
- Use our chart to size holes to the correct drill size for the given tap
- For bent parts, position tapped holes at least half the full die width away from the bend line to prevent distortion.
The die width used for forming our bendable materials is listed on each material's info page. For more details, refer to
our bending guidelines.

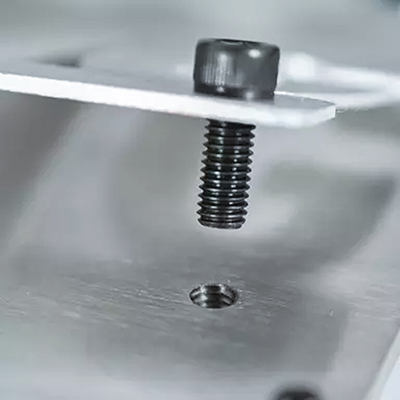
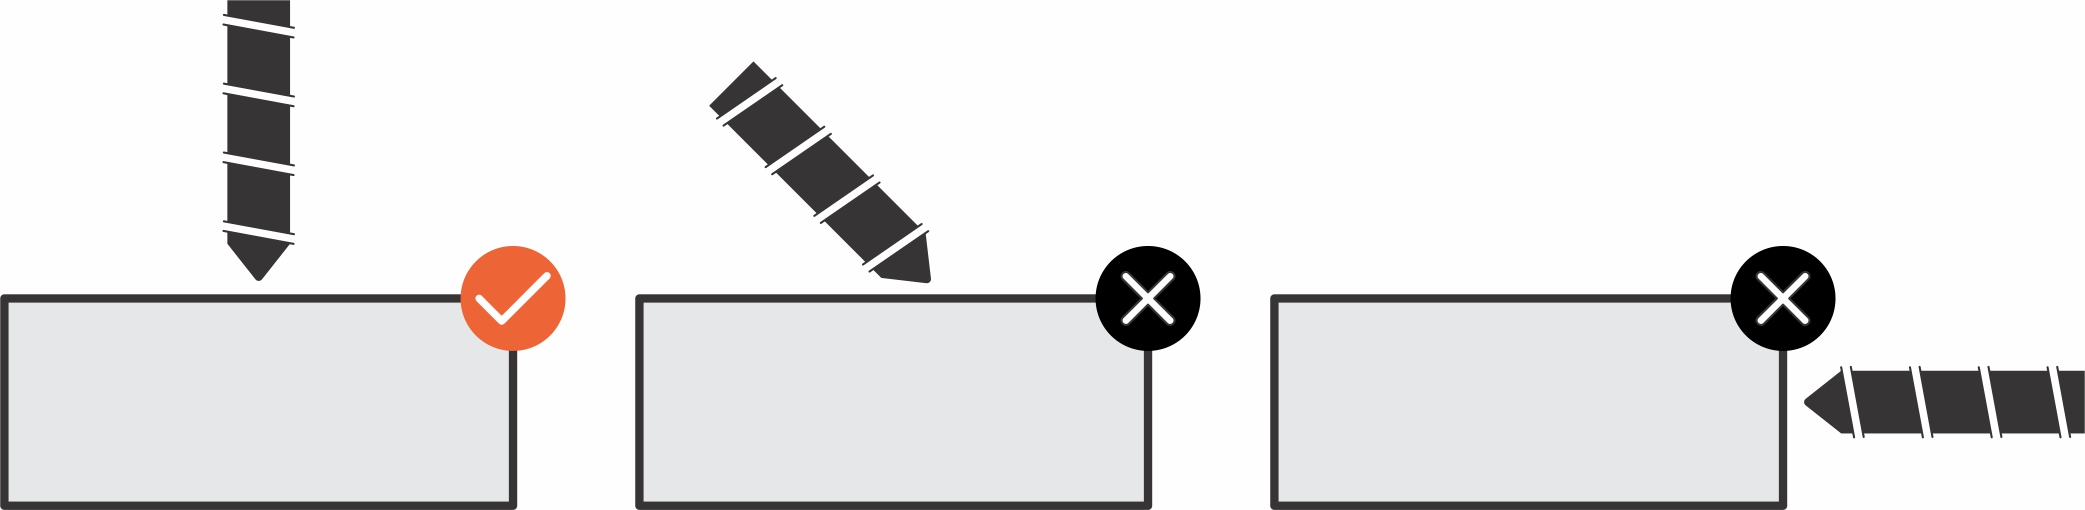
- Tapping is only available at a perpendicular angle to the main surface.
- The minimum part size for tapping is 1″ x 1.5″
- The maximum part size for tapping is 36″ x 46″
WHAT TO EXPECT FROM FINISHED PARTS
- Parts may have a light residue of oil.
- Deburring might be needed.
- Tapped holes close to bends may distort and require chasing.
- All tapped holes will have right-hand threads.
CLOSING STATEMENT
We hope this guide helps you design your parts for greater success with us. Please take the time to
review our other guidelines pages to ensure everything looks perfect. Ultimately, this will save us
all a tremendous amount of time and energy!
If you have specific questions about your design that aren’t covered in our guidelines, don’t hesitate to reach out
to our support team. Our friendly and talented team members will get back to you as soon as possible!
Pre-flight Checklist
- Ensure your file is in an accepted format (2D: .dxf, .dwg, .ai, .eps; 3D: .step, .stp)
- Ensure all holes and cutouts are at least 50% of the material thickness for laser cut parts
- Ensure all holes and cutouts are at least 0.070” for most waterjet cut parts
- For all CNC routed parts, holes and cutouts must be at least 0.125”
- Create your file at a 1:1 scale, preferably using inch or millimeter units
- Ensure all objects are placed on the same layer
- Remove all stray points, duplicate lines, empty objects, and text areas
- Ensure no shapes have open contours
- Ensure all shapes are united, combined, or merged
- Convert all text to outlines or paths
- Ensure cut-out text (reversed text) includes bridges or is stencilized
Materials Available for Tapping

Validate your login